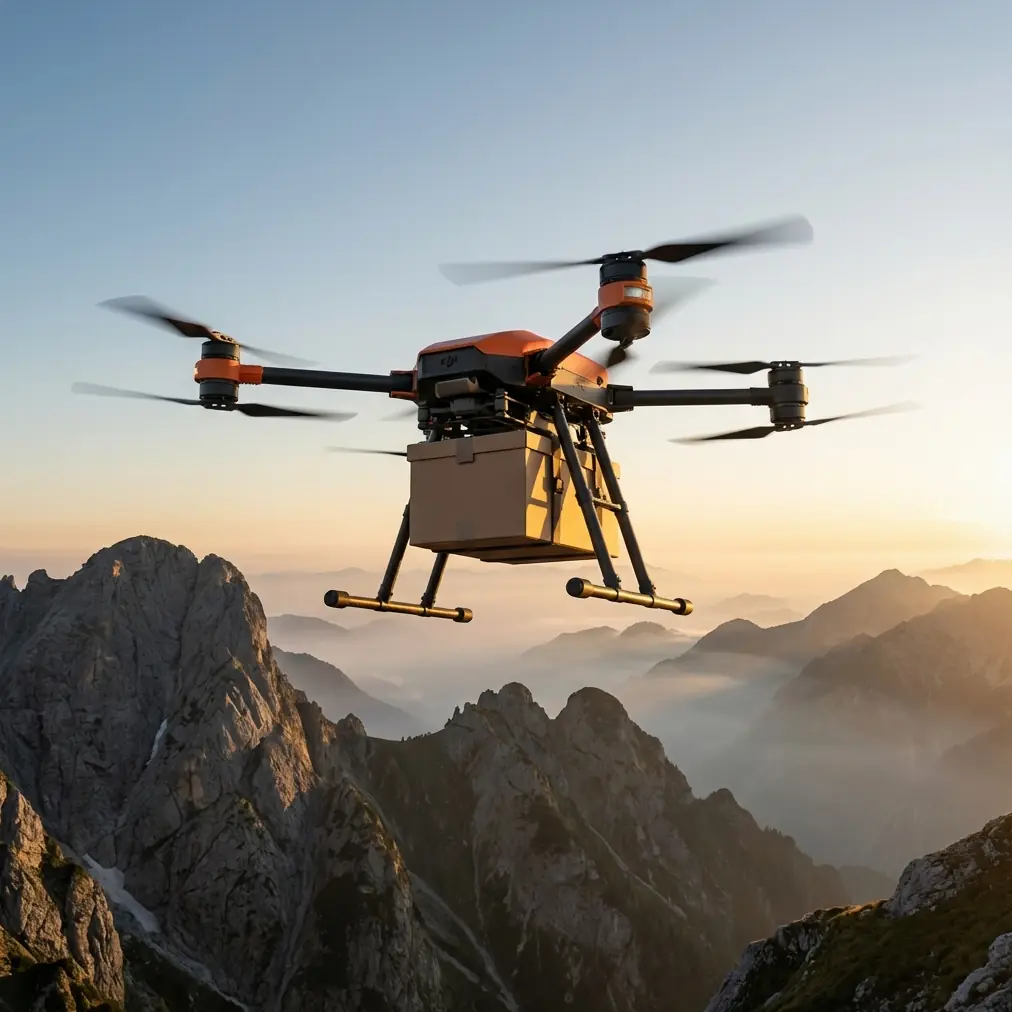
Power Line Filming with the DJI FlyCart 30 Drone
Power Line Filming with the DJI FlyCart 30 Drone
META: Learn how the DJI FlyCart 30 transforms remote power line filming with BVLOS capability, dual-battery endurance, and smart obstacle sensors.
TL;DR
- The FlyCart 30 handles up to a 30 kg payload ratio, making it the go-to platform for hauling cinema-grade cameras across rugged, off-grid terrain for power line inspections.
- Dual-battery redundancy and an emergency parachute system keep your gear safe when filming miles from the nearest road.
- Built-in route optimization and BVLOS support let you pre-program complex corridors along transmission lines without constant manual control.
- This tutorial walks you through every stage—from mission planning to post-flight data review—based on real fieldwork in the Pacific Northwest.
Why Power Line Filming in Remote Areas Demands a Heavy-Lift Drone
Power line inspections in backcountry terrain punish weak equipment. The DJI FlyCart 30 solves the core problem—getting heavy, high-resolution camera rigs to locations that trucks and helicopters can't economically reach—while its intelligent sensors handle surprises like wildlife incursions mid-flight. This guide gives you the exact workflow my team uses to film transmission infrastructure across 200+ km of mountainous corridors each season.
I'm Alex Kim, logistics lead for a utility inspection crew operating in the Pacific Northwest. Over the past two years, my team has transitioned from manned helicopter surveys to drone-based corridor filming. The FlyCart 30 is the platform that made that switch possible, and what follows is the step-by-step tutorial I wish I'd had on day one.
Step 1: Understanding the FlyCart 30's Core Capabilities
Before you plan a single mission, you need to internalize what this airframe can and cannot do. The FlyCart 30 is not a photography quadcopter with a bigger battery. It is a cargo-class delivery drone repurposed—brilliantly—for heavy-sensor deployments.
Key Specifications at a Glance
| Specification | FlyCart 30 Detail | Typical Survey Drone |
|---|---|---|
| Max Payload | 30 kg | 2–4 kg |
| Max Takeoff Weight | 65 kg | 6–10 kg |
| Flight Time (loaded) | Up to 18 min (30 kg) | 25–35 min (light payload) |
| Flight Time (16 kg load) | Up to 28 min | N/A |
| Winch System | Built-in, 20 m cable | Not available |
| BVLOS Support | Yes, with 4G/5G module | Limited |
| Emergency Parachute | Integrated dual chute | Optional third-party |
| Obstacle Sensing | Omnidirectional, ADS-B | Forward/downward only |
| IP Rating | IP55 | IP43–IP45 |
The payload ratio is the headline number. At 30 kg, you can mount a RED Komodo with a gimbal stabilizer, a LiDAR scanner, and a thermal module simultaneously. That multi-sensor stack is what turns a simple flyover into an actionable inspection dataset.
Expert Insight: Don't fixate on maximum payload alone. We typically fly at 16–18 kg to gain an extra 8–10 minutes of endurance. That buffer has saved missions when unexpected headwinds rolled through mountain passes.
Step 2: Mission Planning and Route Optimization
Defining Your Corridor
Power lines follow predictable geometric paths, which makes them ideal candidates for route optimization software. Using DJI DeliveryHub or compatible third-party GIS tools, import the transmission corridor as a KML file and set waypoints at every tower or angle structure.
Key planning parameters to set:
- Altitude AGL: We fly 15–25 m above the highest conductor to capture detail without triggering proximity alerts.
- Speed: 5–8 m/s for cinema-grade footage; 10–12 m/s for rapid LiDAR scanning.
- Overlap: If capturing photogrammetry stills, set 75% frontal and 60% side overlap.
- Corridor width: Program a 50 m buffer on each side to capture vegetation encroachment.
- Return-to-home triggers: Battery threshold at 30%, signal loss timeout at 45 seconds.
BVLOS Considerations
Flying beyond visual line of sight is where the FlyCart 30 separates itself from consumer platforms. With the integrated 4G/5G connectivity dongle and ADS-B receiver, you maintain telemetry and command links even when the drone is several kilometers down a valley.
Before any BVLOS operation:
- Obtain the appropriate waiver or authorization from your national aviation authority (FAA Part 107.31 waiver in the US).
- Deploy at least one visual observer at a midpoint for longer corridors.
- Confirm cellular coverage maps along the entire route—dead zones require pre-programmed autonomous segments.
- File a NOTAM covering your operational volume and timeframe.
Pro Tip: We break corridors into 3–5 km legs with designated landing zones at each endpoint. If a leg fails, you lose only that segment's data, not the entire mission. It also lets you swap dual-battery packs systematically without rushing.
Step 3: Rigging Your Camera Payload
The FlyCart 30's cargo bay is designed for boxes and containers, not camera gimbals. That means you need a custom mounting solution. Here's what works for us:
Recommended Mounting Setup
- Base plate: CNC-machined aluminum plate bolted to the cargo hooks using the standard quick-release interface.
- Vibration dampeners: Four wire-rope isolators between the base plate and gimbal to kill high-frequency motor vibration.
- Gimbal: A 3-axis brushless gimbal rated for your camera's weight class. We use a Gremsy T7 for payloads up to 12 kg.
- Power: Tap into the FlyCart 30's auxiliary power output (44 V DC) through a voltage regulator to run the gimbal and camera without separate batteries.
- Data link: HDMI-to-wireless transmitter on the gimbal sends a live preview to the ground station for real-time framing adjustments.
Weight Distribution Matters
The FlyCart 30's flight controller compensates for off-center loads, but poor weight distribution still cuts efficiency and stresses motors unevenly. Center your camera rig's center of gravity within 2 cm of the cargo bay's geometric center, both laterally and longitudinally. Use a bathroom scale under each landing gear leg during pre-flight to verify balance.
Step 4: Flying the Mission—And the Eagle Encounter
With the route loaded, batteries charged, and payload secured, launch day is where theory meets reality.
Pre-Flight Checklist
- Confirm dual-battery status: Both packs above 98% and firmware matched.
- Run IMU and compass calibration if you've traveled more than 50 km from your last calibration site.
- Verify emergency parachute arming—the FlyCart 30's integrated dual-chute system requires manual arming via the controller before each flight.
- Check wind: The FlyCart 30 handles up to 12 m/s sustained wind, but loaded performance degrades above 8 m/s.
- Visually inspect propellers for nicks, especially after fieldwork in dusty or sandy LZs.
Mid-Flight: When Wildlife Gets Curious
On a September corridor run along a ridge in the Cascade Range, our FlyCart 30 was 2.8 km downrange when its omnidirectional obstacle sensors flagged a fast-moving object converging from the east. The live camera feed showed a juvenile bald eagle banking directly toward the drone, likely investigating the unfamiliar shape in its territory.
The FlyCart 30's ADS-B and vision-based avoidance system triggered an automatic lateral shift of 8 m, pausing the waypoint mission and hovering. The eagle circled twice at roughly 10 m distance, then lost interest and peeled away. The drone resumed its route autonomously within 14 seconds of the all-clear.
Without omnidirectional sensing, that encounter could have meant a bird strike at 70+ km/h, a destroyed camera rig, and a potentially injured raptor. The FlyCart 30 handled it without any pilot input. That single event justified every dollar of the platform investment for our operations manager.
Step 5: Post-Flight Data Review and Battery Management
After landing, resist the urge to immediately pack up. Follow this sequence:
- Download flight logs to verify the route was flown as planned—check for any deviation events.
- Inspect the payload mount for signs of vibration loosening.
- Remove dual-battery packs and log cycle count, voltage, and temperature. Store between 40–60% charge if not flying again within 48 hours.
- Back up footage to two separate drives before leaving the field. We use ruggedized SSDs in a Pelican case.
Dual-Battery Longevity Tips
- Never charge immediately after flight—let packs cool to below 35°C first.
- Rotate packs evenly so cycle counts stay within 5 cycles of each other.
- Store in a climate-controlled environment between 10–25°C during off-season.
Common Mistakes to Avoid
Overloading to maximum payload on every flight. Flying at 30 kg constantly burns through motor life and battery cycles. Design your sensor stack to stay at 60–70% of max capacity whenever possible.
Skipping the emergency parachute arm step. The FlyCart 30's dual parachute won't deploy if you forget to arm it pre-flight. This is a manual toggle, not an automatic default. Tape a checklist card to your controller if you have to.
Ignoring cellular dead zones on BVLOS routes. A dropped 4G link in a valley doesn't crash the drone—it triggers return-to-home—but you lose the data from that segment and burn battery on an unplanned RTH.
Using consumer-grade SD cards. At 4K 120fps or 8K raw, write speeds matter. Use cards rated at V60 or V90 minimum. A buffer overflow mid-corridor means re-flying the entire leg.
Neglecting local wildlife regulations. Flying near raptor nests during breeding season can violate endangered species protections. Check with wildlife agencies before scheduling corridor missions in spring and early summer.
Frequently Asked Questions
Can the FlyCart 30's winch system be used to lower a camera into hard-to-reach positions along power lines?
Yes. The integrated 20 m winch system can lower a sensor package beneath the drone while it hovers at a safe altitude above the conductors. This is especially useful for capturing underside imagery of insulators or splice connections without flying dangerously close to live wires. Ensure the winch payload does not exceed 40 kg (drone + payload combined within the 65 kg MTOW limit) and that the pendulum effect is accounted for in windy conditions.
How does the dual-battery system handle a single battery failure mid-flight?
The FlyCart 30's dual-battery architecture is designed for redundancy. If one pack fails or drops below safe voltage, the remaining pack assumes full load, and the flight controller automatically triggers a controlled return-to-home or proceeds to the nearest designated landing zone. Flight time on a single pack is significantly reduced—expect roughly 40–50% of your planned endurance—so always program conservative RTH thresholds.
Is the FlyCart 30 suitable for night operations along power line corridors?
The platform itself supports night flight—its anti-collision strobes and downward lighting meet most regulatory visibility requirements. The limiting factor is your camera and sensor payload. Thermal imaging modules work exceptionally well at night, and LiDAR is light-independent. Visible-light filming at night requires supplemental illumination, which adds weight and power draw. From a regulatory standpoint, night BVLOS operations require additional waivers in most jurisdictions, so plan your authorization timeline accordingly.
Ready for your own FlyCart 30? Contact our team for expert consultation.